Installation
To install a devstack, we require a Desktop/Laptop/VM with below requirements,
Requirements
Recommended Hardware
- 8GB RAM
- 2 Core Processors
- 1 Ethernet (Virtual Ethernet in case of VM)
- Internet access
Recommended OS
- Ubuntu 16.04
Devstack can be installed on other Linux flavors also, such as CentOS. But Ubuntu has a native support. Hence I prefer Ubuntu. Also I prefer to install it in a VM, as we have many advantages in it.
Note : I am using a VM(8GB Ram) and Ubuntu 14.04 OS to install devstack. Throughout the book, all the examples, exercise,screenshot are executed/captured in the VM.
Decide on Openstack release
Openstack has many releases(icehouse,kilo,juno,liberty,mitaka,newton,ocata), and new release is happening every year. The preferred release for installation is the latest stable one. The latest stable release is OCATA.
Keystone,Glance,Nova,Neutron are minimum projects required to run devstack. Other projects include cinder,swift,heat,etc can be added.
If you like to install older eol version(ex: Mitaka), you have to specifiy the branch details in the local.conf file.
Installation Procedure
Note : Devstack can not be installed with root user. So the following steps needs to be done with normal user with sudo access.
Update the Ubuntu Packages
Once your Ubuntu 14.04 OS is ready, Make sure you update it as below.
  sudo apt-get update
  sudo apt-get upgrade
  sudo apt-get install git
Download the devstack
In your home folder, Clone the devstack from the openstack git repository and change it to the ocata release
  cd
  git clone https://github.com/openstack-dev/devstack
  cd devstack
  git checkout stable/queens
create local.conf file
create a local.conf file in your devstack folder with below contents
For queens openstack Release:
[[local|localrc]]
RECLONE=True
HOST_IP=10.0.1.3
SERVICE_TOKEN=mytoken123
ADMIN_PASSWORD=openstack123
MYSQL_PASSWORD=mysql123
RABBIT_PASSWORD=rabbit123
SERVICE_PASSWORD=$ADMIN_PASSWORD
LOGFILE=$DEST/logs/stack.sh.log
LOGDAYS=2
NEUTRON_LBAAS_SERVICE_PROVIDERV2="LOADBALANCERV2:Haproxy:neutron_lbaas.drivers.haproxy.plugin_driver.HaproxyOnHostPluginDriver:default"
enable_plugin neutron-lbaas https://github.com/openstack/neutron-lbaas.git stable/queens
disable_service n-net c-api c-sch c-vol
enable_service q-svc q-agt q-dhcp q-l3 q-meta q-lbaasv2
[[post-config|$NEUTRON_CONF]]
[DEFAULT]
service_plugins+=,neutron_lbaas.services.loadbalancer.plugin.LoadBalancerPluginv2
[[post-config|NEUTRON_LBAAS_CONF]]
[service_providers]
service_provider=LOADBALANCERV2:Haproxy:neutron_lbaas.drivers.haproxy.plugin_driver.HaproxyOnHostPluginDriver:default
Note:
local.conf file is a configuration file for devstack installation. All passwords, openstack services details, openstack services configuration, are configured here. Devstack uses this configuration file for installing and configuring the openstack components.
we are configuring the passwords as below,
    ```
    SERVICE_TOKEN=mytoken123
    ADMIN_PASSWORD=openstack123
    MYSQL_PASSWORD=mysql123
    RABBIT_PASSWORD=rabbit123
    SERVICE_PASSWORD=$ADMIN_PASSWORD```
And, we are enabling neutron networking instead of nova networking(old) using the below commands.
  ```
    disable_service n-net
    enable_service q-svc q-agt q-dhcp q-l3 q-meta ```
Specify the system IP in HOST_IP=10.0.1.6 field.
Also, disabled the cinder services, as i dont require. if you need, you can enable that.
Starts the installation
cd
cd devstack
./stack.sh
Thats all. Installation may take 1 Hour+ to complete it. On Successful installation, you will see this message.
=======================
DevStack Components Timed
========================

run_process - 57 secs
test_with_retry - 2 secs
apt-get-update - 3 secs
pip_install - 277 secs
restart_apache_server - 10 secs
wait_for_service - 10 secs
git_timed - 156 secs
apt-get - 70 secs


This is your host IP address: 10.10.10.5
This is your host IPv6 address: ::1
Horizon is now available at http://10.10.10.5/dashboard
Keystone is serving at http://10.10.10.5:5000/
The default users are: admin and demo
The password: openstack123
The installation log file is located in /opt/stack/log/stack.sh.log
Devstack downloads the required repositories from git in the /opt/stack folder.
cloud@devstack1:/opt/stack$ pwd
/opt/stack
cloud@devstack1:/opt/stack$ ls -lrt
total 52
drwxr-xr-x 13 cloud cloud 4096 Jul 30 14:32 keystone
drwxr-xr-x 10 cloud cloud 4096 Jul 30 14:34 glance
drwxr-xr-x 10 cloud cloud 4096 Jul 30 14:34 cinder
drwxr-xr-x 12 cloud cloud 4096 Jul 30 14:35 neutron
drwxr-xr-x  8 cloud cloud 4096 Jul 30 14:36 noVNC
drwxr-xr-x 13 cloud cloud 4096 Jul 30 14:37 nova
drwxr-xr-x  3 cloud cloud 4096 Jul 30 14:38 status
drwxr-xr-x  7 cloud cloud 4096 Jul 30 14:41 requirements
drwxr-xr-x 11 cloud cloud 4096 Jul 30 14:42 horizon
drwxr-xr-x  7 cloud root  4096 Jul 30 14:45 data
drwxr-xr-x 11 cloud cloud 4096 Jul 30 14:45 tempest
-rw-r--r--  1 cloud cloud   44 Jul 30 14:45 devstack.subunit
drwxr-xr-x  2 cloud cloud 4096 Jul 31 05:40 logs
cloud@devstack1:/opt/stack$
Now let us explore the openstack components etc
Openstack Queens with LBAAS installation
UBUNTU 16.04 devstack branch - stable/queens
local.conf
[[local|localrc]]
RECLONE=True
HOST_IP=10.0.1.3
SERVICE_TOKEN=mytoken123
ADMIN_PASSWORD=openstack123
MYSQL_PASSWORD=mysql123
RABBIT_PASSWORD=rabbit123
SERVICE_PASSWORD=$ADMIN_PASSWORD
LOGFILE=$DEST/logs/stack.sh.log
LOGDAYS=2
NEUTRON_LBAAS_SERVICE_PROVIDERV2="LOADBALANCERV2:Haproxy:neutron_lbaas.drivers.haproxy.plugin_driver.HaproxyOnHostPluginDriver:default"
enable_plugin neutron-lbaas https://github.com/openstack/neutron-lbaas.git stable/queens
disable_service n-net c-api c-sch c-vol
enable_service q-svc q-agt q-dhcp q-l3 q-meta q-lbaasv2
[[post-config|$NEUTRON_CONF]]
[DEFAULT]
service_plugins+=,neutron_lbaas.services.loadbalancer.plugin.LoadBalancerPluginv2
[[post-config|NEUTRON_LBAAS_CONF]]
[service_providers]
service_provider=LOADBALANCERV2:Haproxy:neutron_lbaas.drivers.haproxy.plugin_driver.HaproxyOnHostPluginDriver:default
Installing the older openstack versions:
Assume, i would like to install openstack Mitaka version, Mitaka is End of Life version. So In Openstack Repositories(Neutron, nova etc),it is moved out from stable branch.
  cd
  git clone https://github.com/openstack-dev/devstack
  cd devstack
  git checkout mitaka-eol
Local.conf
[[local|localrc]]
RECLONE=True
SERVICE_TOKEN=mytoken123
ADMIN_PASSWORD=openstack123
MYSQL_PASSWORD=mysql123
RABBIT_PASSWORD=rabbit123
SERVICE_PASSWORD=$ADMIN_PASSWORD
LOGFILE=$DEST/logs/stack.sh.log
LOGDAYS=2
GLANCE_BRANCH=mitaka-eol
NOVA_BRANCH=mitaka-eol
NEUTRON_BRANCH=mitaka-eol
KEYSTONE_BRANCH=mitaka-eol
CINDER_BRANCH=mitaka-eol
HORIZON_BRANCH=mitaka-eol
REQUIREMENTS_BRANCH=mitaka-eol
disable_service n-net c-api c-sch c-vol tempest
enable_service q-svc q-agt q-dhcp q-l3 q-meta
Openstack Screens
devstack creates a screen named 'stack' with x windows. Each window represents the process/logs of the openstack components
If you are not familiar with screen
Screen is a full-screen window manager that multiplexes a physical terminal between several processes, typically interactive shells.
Reference :
- List the available screens
stack@sureshdev:~$ screen -ls

There is a screen on:
    8146.stack    (07/12/16 20:00:04)    (Detached)
1 Socket in /var/run/screen/S-stack.
- Attach with devstack screen
stack@sureshdev:~$ screen -x stack
You will see the below(similar) screen
Some Important Screen Shortcuts
- CTRL + A + " To list all screen windows and select the screen with UP/DOWN ARROW
- CTRL + A + n Move to next screen window
- CTRL + A + p Move to previous screen window
- CTRL + D Detach(exit) from screen
The below picture lists all screen windows (CTRL+A+" output)
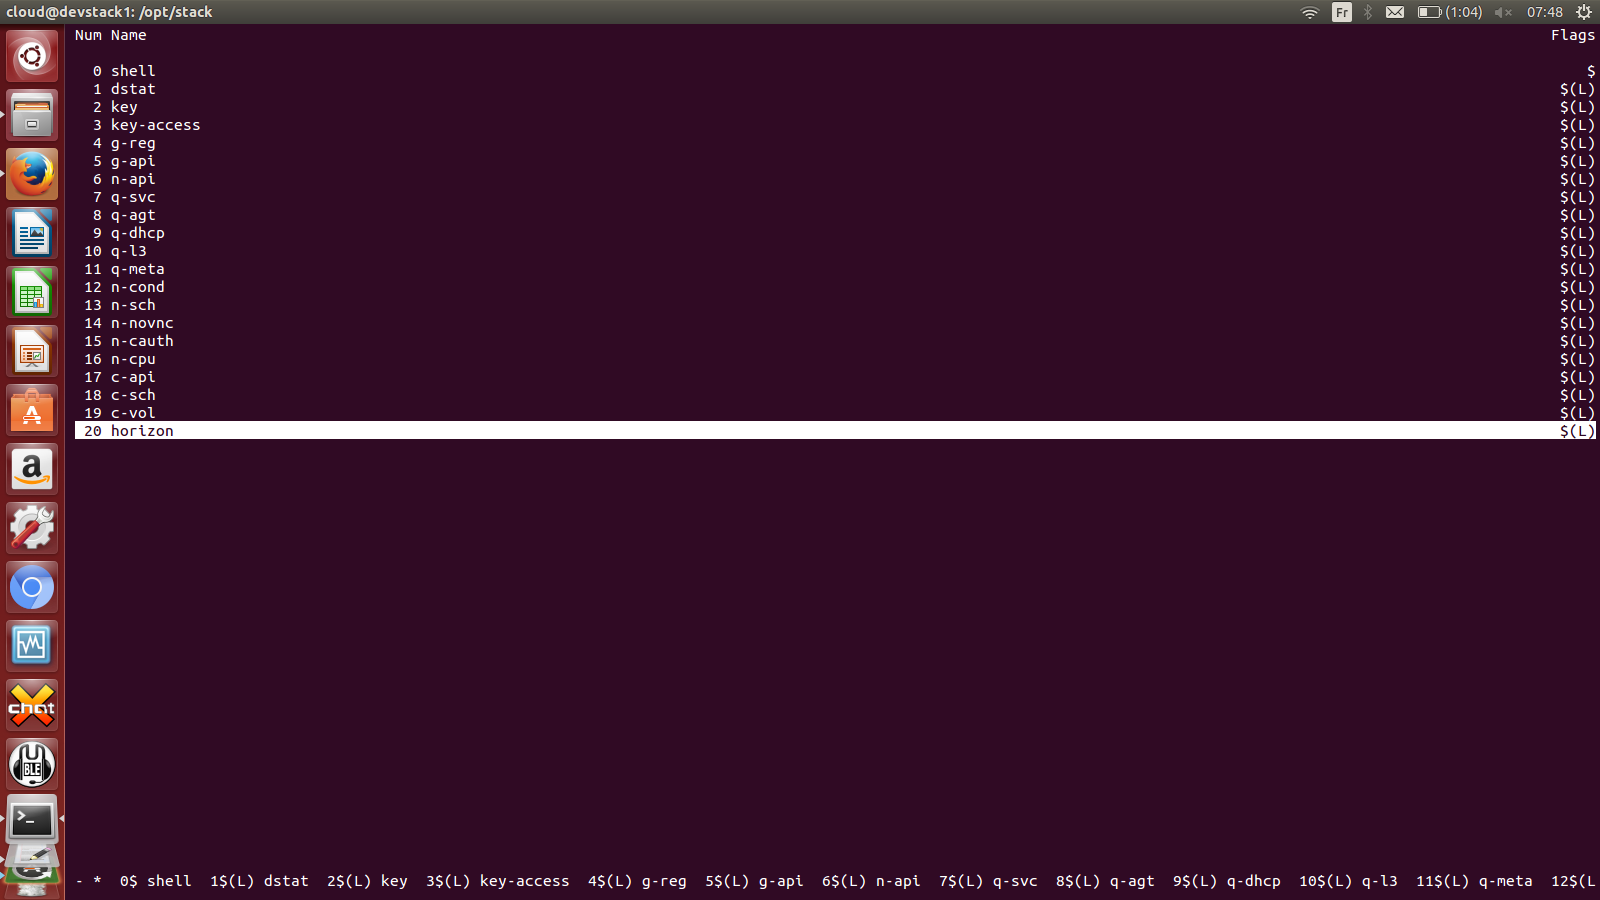
- key,key-access are for keystone component, which displays the keystone log files
- g-reg,g-api are glance component windows. glance registry process runs on g-reg window and glance api process runs on g-api window.
- n-api,n-cond,n-sch,n-novnc,n-cauth,n-cpu are nova component window. n-api window run nova-api process, n-cond window runs nova-conductor process,n-sch window runs with nova-scheduler,n-novnc runs with nova-vnc console process,n-cauth window runs with nova auth module,n-cpu window runs with nova compute.
- q-svc,q-agt,q-dhcp,q-l3,q-meta are neutron compoents.
- c-api,c-vol,c-sch are cinder components
- horizon is horizon(webui) component.
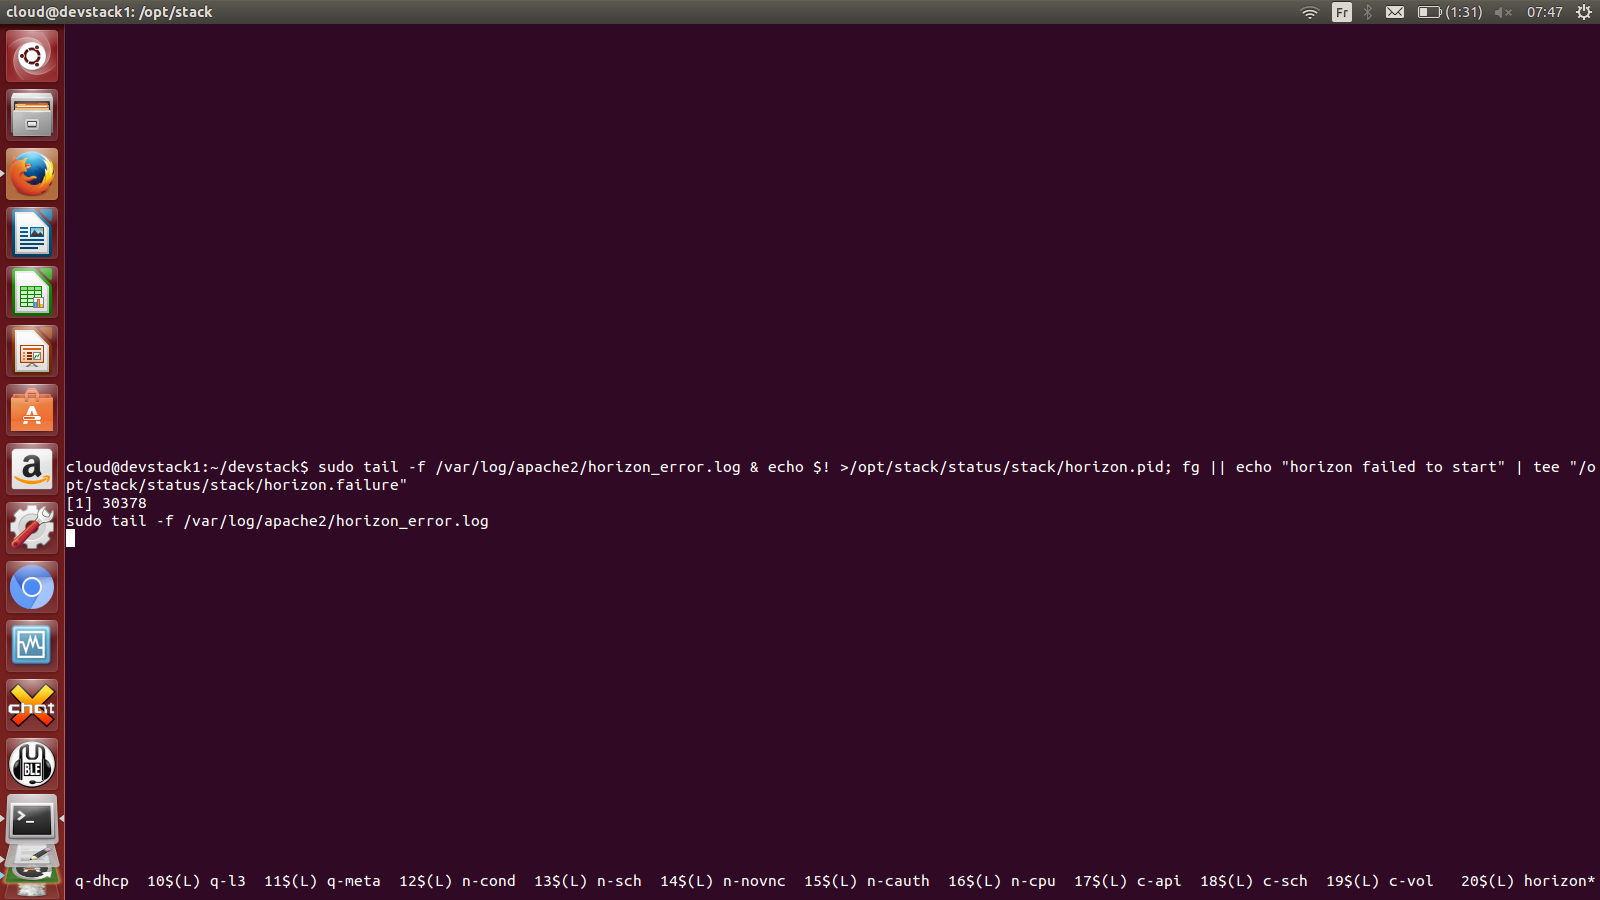
Debugging the Failure installation
Devstack installation may fail, due to the following reasons.
- Failure related to third party software/services/dependent libraries
- openstack software error(untested patches),
- Wrong configuration and credentials in the openstack services etc.
- Dependent Services are not running/misconfigured(such as mysql,rabbitmq etc)
- Uncleaned Installation (Previous devstack was not cleaned properly)
The log file is present in /opt/stack/log/stack.log file. First we need to check the log file to understand the reason for failure, and correct it.
Most of the times,simply restart the installation will work.
Restart the installation using below commands.
./unstack.sh
./stack.sh
You may get in to the situation, that you want to cleanly uninstall the devstack with no foot prints.
cd
cd devstack
./unstack.sh
./clean.sh
cd .. && rm -rf devstack
rm -rf /opt/stack
How to use Use
we can use the openstack via Web UI(Horizon) or Openstack CLI.
By default demo project is created with "demo" user. The default admistrative username is admin. we have specified the password in local.conf file. In my example, it is "openstack123".
Horizon
- Access with UI
http://
CLI
To access via openstack CLI, openrc script needs to be executed first with the project name and username as a parameter.
 source openrc
 cd
 cd devstack
 source openrc admin admin
Now client is ready to use, execute some sample operations as below,
cloud@devstack1:~/devstack$ openstack server list

cloud@devstack1:~/devstack$ openstack image list
+--------------------------------------+---------------------------------+--------+
| ID                                   | Name                            | Status |
+--------------------------------------+---------------------------------+--------+
| 32d7cb58-aadc-4853-a888-2b56556c914e | cirros-0.3.4-x86_64-uec         | active |
| 7ca2ec87-ad98-4149-92d5-4c7bf02ea2b0 | cirros-0.3.4-x86_64-uec-ramdisk | active |
| c8595f74-2318-454e-a012-99322bb5589d | cirros-0.3.4-x86_64-uec-kernel  | active |
+--------------------------------------+---------------------------------+--------+
cloud@devstack1:~/devstack$ openstack flavor list
+----+-----------+-------+------+-----------+-------+-----------+
| ID | Name      |   RAM | Disk | Ephemeral | VCPUs | Is Public |
+----+-----------+-------+------+-----------+-------+-----------+
| 1  | m1.tiny   |   512 |    1 |         0 |     1 | True      |
| 2  | m1.small  |  2048 |   20 |         0 |     1 | True      |
| 3  | m1.medium |  4096 |   40 |         0 |     2 | True      |
| 4  | m1.large  |  8192 |   80 |         0 |     4 | True      |
| 42 | m1.nano   |    64 |    0 |         0 |     1 | True      |
| 5  | m1.xlarge | 16384 |  160 |         0 |     8 | True      |
| 84 | m1.micro  |   128 |    0 |         0 |     1 | True      |
+----+-----------+-------+------+-----------+-------+-----------+
cloud@devstack1:~/devstack$
Good, Your installation is perfect and works.